

Condensation in Outdoor Projector Enclosures: What Buyers Should Check
Condensation in Outdoor Projector Enclosures: What Buyers Should Check
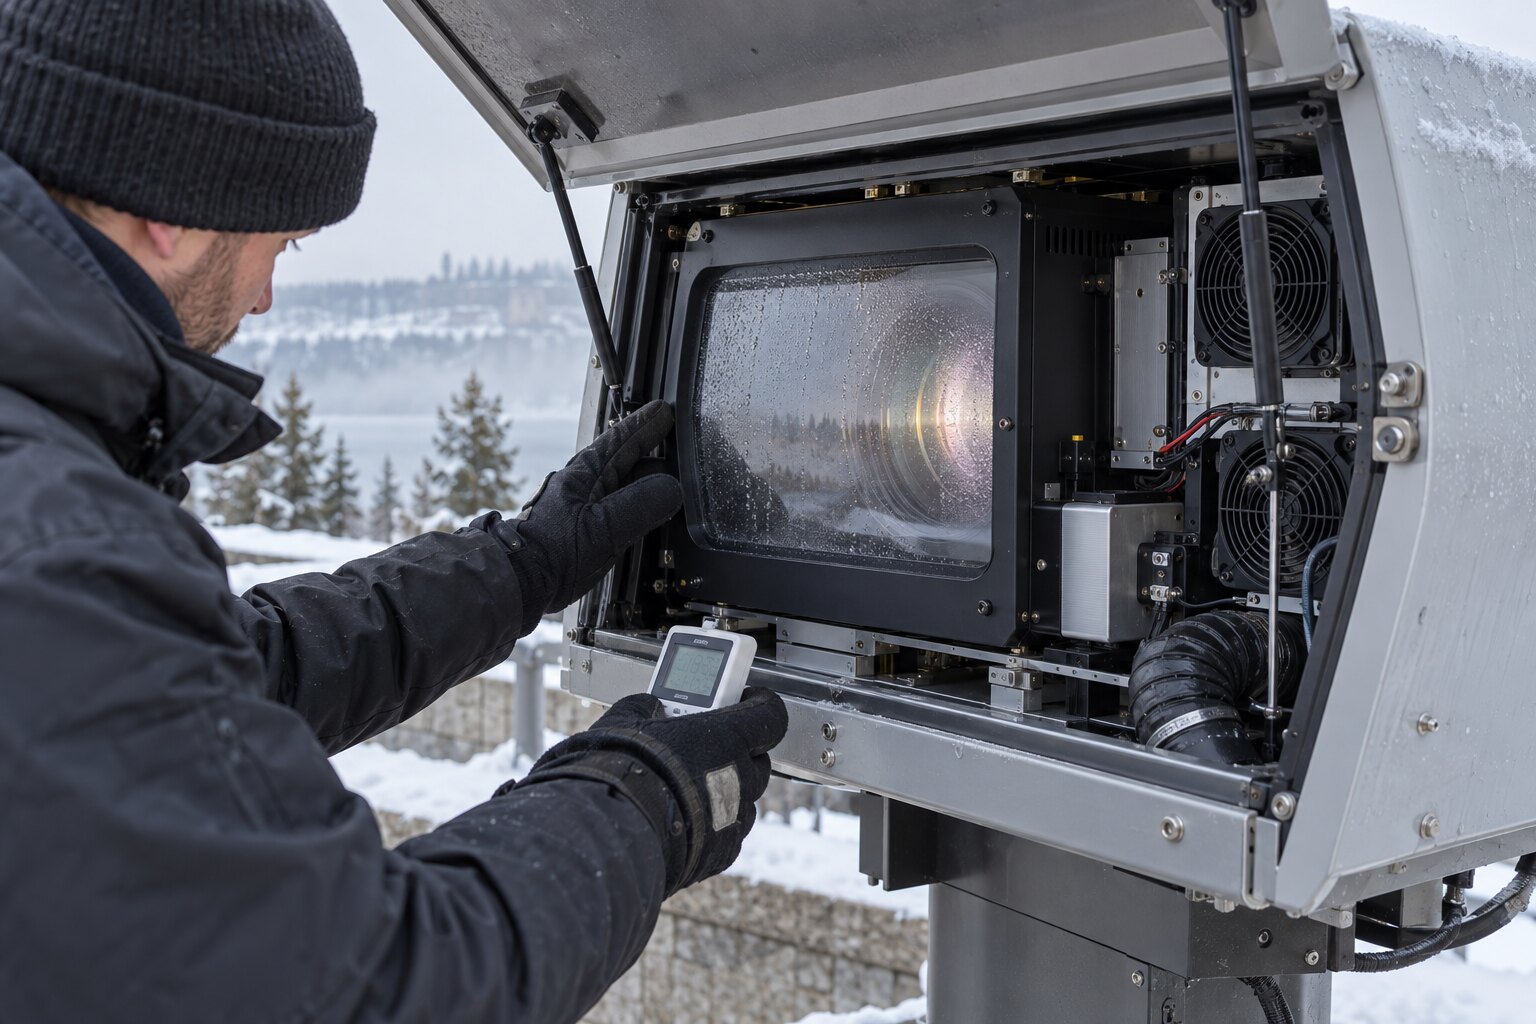
Water on an outdoor projector enclosure can come from rain, but moisture inside the housing can form even when the seals are intact. Warm air holds water vapour; when a surface cools below that air’s dew point, vapour can condense on it. In an enclosure, the optical window, metal panels and a projector that has been shut down may all see different temperatures during a weather change.
For a permanent installation, that is an operating problem as well as a sealing problem. A fogged window can spoil the image, while repeated moisture exposure can damage equipment. The design should manage how air and water move through the entire system, not rely on a heater added at the end.
First identify where the water is
Droplets on the outside of an optical window may be dew, rain or melting frost. Moisture on the inside suggests a different investigation: humid air entry, a thermal bridge, drainage or the enclosure’s temperature and ventilation strategy. Water around a connector or floor may be entering through a cable route rather than condensing at all.
Photograph the condition before opening the enclosure. Record outdoor temperature, humidity if known, projector state, recent rain or snow, time since shutdown and exactly where moisture appears. A pattern that occurs on cold mornings after shutdown points toward a different cause from water that follows wind-driven rain.
Why shutdown and startup deserve attention
An operating projector adds substantial heat. After shutdown, the enclosure and window cool at different rates. If humid air has entered, the coolest internal surface may collect moisture. When a cold projector starts, its internal components may still be below the surrounding air’s dew point. Heating the whole enclosure, controlling air exchange or delaying startup can be considered, but the right sequence depends on the projector and enclosure design.
Do not assume that more ventilation always means drier equipment. A ventilated box may draw in humid ambient air; a poorly managed sealed box can trap moisture introduced during service. The appropriate strategy depends on climate, heat load, duty cycle and the projector manufacturer’s environmental limits.
Separate condensation control from weather sealing
A gasket and overlapping rain path help keep liquid water out. They do not automatically control vapour already inside the enclosure, nor do they solve moisture that arrives through an intake. Conversely, a dry internal climate does not excuse an exposed upward-facing seam or an unprotected cable entry.
Review the door, window cassette, panel joints, cable glands, intake and exhaust paths in the installation’s actual orientation. If a housing may rotate into portrait or downward projection, a seam that drains in landscape may become a water shelf. Ask how water leaves every exposed surface, how service panels reseal and how the design handles pressure changes.
Protect the optical window without hurting the image
The window needs an unobstructed view of the full projected cone, including lens shift and adjustment margin. Its mounting should be accessible for cleaning and inspection. Evaluate both sides of the pane for fogging, dirt and damage, and make sure nearby warm-air flow or a heater does not create a local hot spot or distort the optical path.
Glass angle, coatings and projector lens position can affect reflections and image quality. These choices should be tested with the intended projector rather than treated as generic features of any outdoor box.
Use sensors and alerts for diagnosis
Temperature and humidity readings can show how the enclosure behaves during operation and shutdown. They are most useful when the sensor location, calibration and alarm thresholds reflect actual risk. An alert should identify an owner and a response: inspect a filter, check a fan, delay startup or arrange a site visit.
Remote monitoring can help a permanent installation avoid an unnoticed fault, but it cannot prove that a window is clean, a gasket is seated or a drain is clear. Pair telemetry with physical inspection. The site-survey checklist helps record exposure and service access before equipment is chosen.
Questions to ask an enclosure supplier
- What projector model, lens and orientation has the enclosure been designed around?
- How are intake and exhaust paths separated, filtered and protected from weather?
- What happens to internal temperature and humidity during shutdown and cold startup?
- Where can water collect in each proposed mounting orientation?
- Can the optical window, filters and seals be reached without disturbing alignment?
- Which environmental and electrical claims are documented for the specific configuration?
- What inspection and maintenance work will the owner need to perform?
Ask for drawings and a written operating sequence if the application is demanding. An enclosure that physically fits the projector is only the start of compatibility. Our broader outdoor projector enclosure guide covers cooling, heating and installation alongside moisture management.
Plan the whole outdoor system
For a permanent projection display, the enclosure must work with the projector, mounting, power, controls, service route and local exposure. 360 Illumination makes outdoor projector enclosures in Canada and can discuss a configuration around your actual equipment and site. Review the Projection Enclosures page, then send us your projector model, orientation and environment for a compatibility discussion.